
Subterranean termite damage and related protection measures may exceed $10 billion annually in the United States, according to a USDA Forest Service estimate. That figure isn't limited to commercial buildings, but it explains why owners in Crown Point, IN shouldn't treat a commercial pest inspection as a quick bug count. You're looking for hidden damage, moisture, and access points before they become a capital expense, a tenant complaint, or a failed health review. For commercial pest control or an exterminator near me, start with what the inspection covers.
What a Commercial Pest Inspection Covers
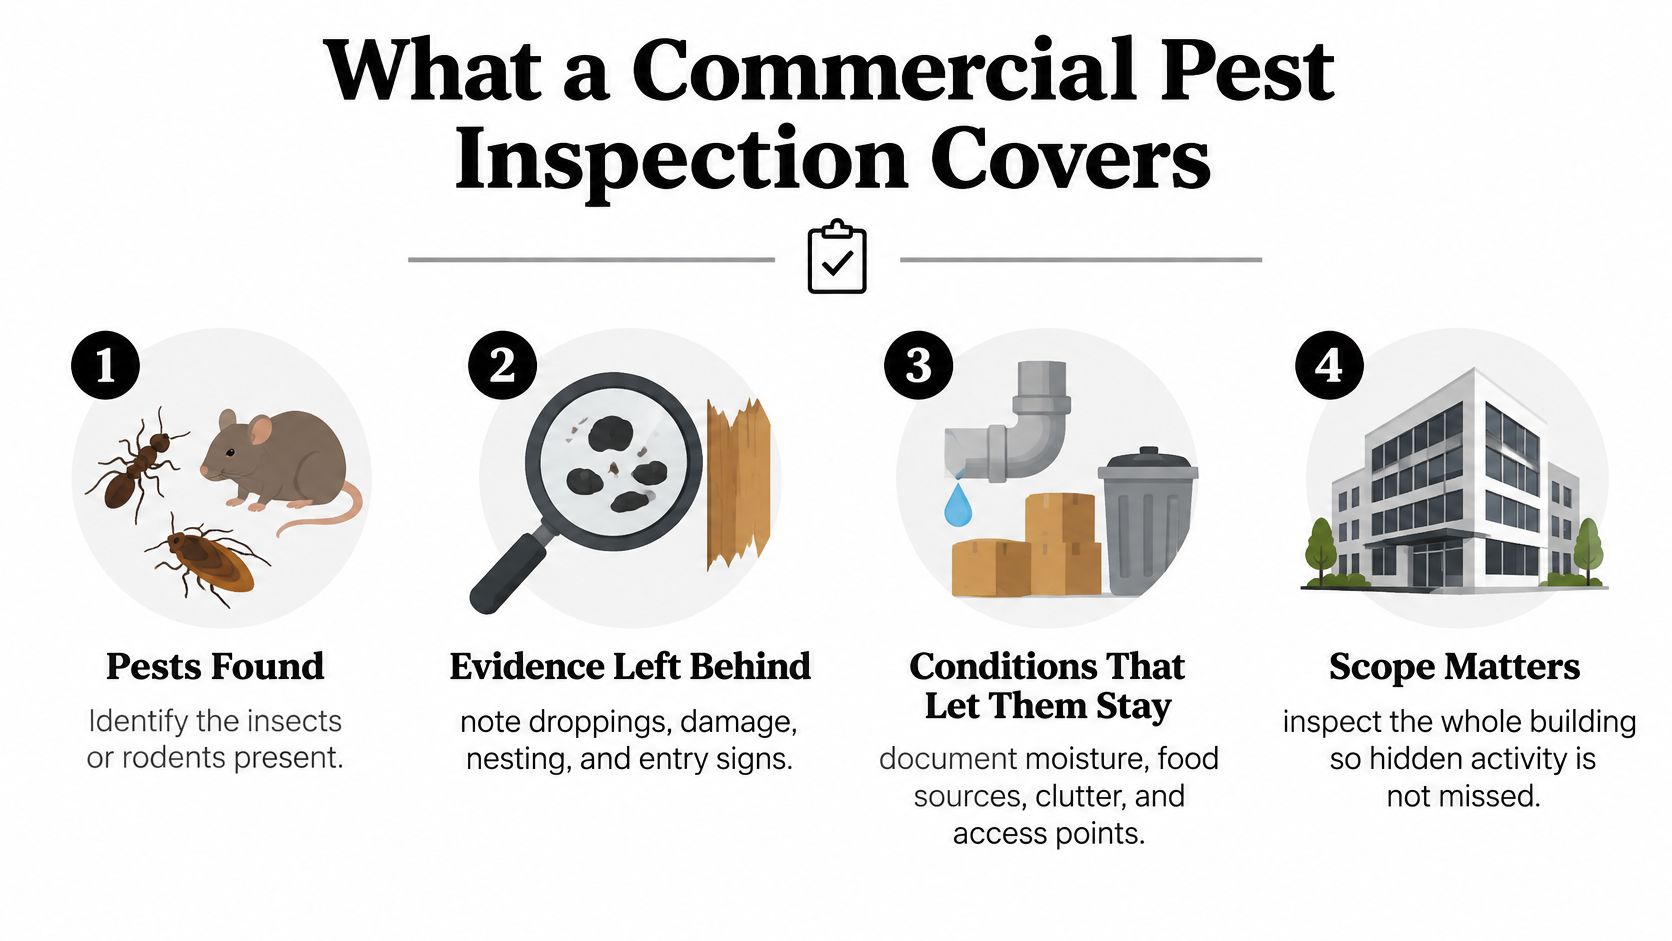
A commercial pest inspection is a building-wide review that finds pests, the evidence they leave behind, and the conditions that let them stay. Scope matters because commercial buildings hold more wood framing, tenant improvements, stored materials, grounds with plants, and moisture sources than a typical home. A live insect is only one finding. Droppings, mud tubes, gnaw marks, shed skins, nesting material, and hollow wood often tell the fuller story.
Termites show why a narrow look fails. Wood deterioration can advance inside framing while the surface looks sound, and an inspection should identify conducive conditions, active or previous infestation, moisture problems, and inaccessible risk areas. That record supports budgeting, maintenance planning, and transaction due diligence, not just a yes or no answer on inspection day.
The checklist below summarizes the four parts of a complete review.
Zones to Confirm in Writing
| Area | What the inspector checks | Typical finding |
|---|---|---|
| Exterior perimeter | Foundation cracks, grading, gaps around utility lines, vegetation touching walls | Entry gaps and standing water |
| Loading docks and dumpsters | Door sweeps, debris, lids, spilled food | Rodent travel routes and ant trails |
| Roof and penetrations | Flashing, vent openings, rooftop drains | Bird and rodent access points, leaks |
| Kitchens and food areas | Under equipment, floor drains, grease traps, storage | Cockroach harborage and moisture |
| Storage and back rooms | Shelving, cardboard, pallets, bulk goods | Stored-product pests and rodent droppings |
| Accessible wall voids and attics | Insulation, wood framing, void openings | Termite mud tubes, nesting activity |
| Mechanical and HVAC areas | Condensate lines, drip pans, humid zones | Moisture sources that support pests |
| Restricted or tenant areas | Access limits and what could not be checked | Gaps recorded for follow-up |
Walk your own building against that list. A Crown Point warehouse may need dock doors and pallet storage checked closely, while a restaurant needs floor drains and grease areas. Locked tenant suites, sealed voids, and unsafe attic spaces must be listed as not inspected, not assumed clear. Before service starts, ask us to confirm each zone and any access gap in writing, so you know what the report can and can't support.
Practical rule: If an area wasn't opened or safely reached, it belongs in the inaccessible column, never in the clear column.
Where Commercial Pests Start and Why
Pests come for four things, food, water, shelter, and easy access. A building that offers several at once will keep attracting them after a treatment wears off. Say ants trail from a break room to a leaking pipe chase. Killing the visible ants doesn't remove the sugar, grease, or water that brought them there.
Pest, Condition, and First Place to Look
| Pest | Conditions that support it | Where to look first |
|---|---|---|
| Termites | Wood in contact with soil, leaks, poor drainage, blocked vents | Exposed wood, mud tubes, hollow-sounding beams |
| Rodents | Gaps around utilities, food waste, clutter, unsealed dumpsters | Droppings, gnaw marks, wall voids, loading areas |
| Cockroaches | Moisture, food residue, warm voids behind equipment | Under equipment, floor drains, wall cracks |
| Ants | Sugar and grease spills, moisture leaks | Trails along baseboards and near drains |
| Stored-product pests | Unsealed bulk food, damaged packaging | Dry goods, pantries, pallet stacks |
| Mosquitoes | Standing water in containers, gutters and drains | Gutters, birdbaths, planters, drains |
| Stinging insects | Open trash, sheltered nest sites | Eaves, soffits, dumpster lids |
For termites, the EPA termite identification and control guidance identifies poor grading or drainage around the foundation, cracks or utility penetrations, plumbing leaks, blocked vents, vegetation touching exposed wood, and firewood or wood debris beside the building. An inspector probes exposed structural wood with a flathead screwdriver or similar tool to find hollow areas and checks for swarmers. Periodic checks matter because colonies shouldn't get time to become established unseen.
Rodents follow a different logic. Small gaps around pipes, dock doors that don't seal, and food waste near dumpsters give them entry and a reason to stay, so exclusion and sanitation do more long-term work than one treatment. Facilities comparing pest control for warehouses should pay special attention to receiving doors, pallet stacks, and damaged packaging. Correct identification comes first in every case, because termite control, rodent control, ant control, and mosquito control each target a different behavior and a different condition.
Moisture and Building Conditions That Attract Pests
Treating pests alone doesn't solve a wet building. A roof leak, plumbing chase, condensate line, or damp storage zone can keep insects active and weaken wood long after a product is applied. In Northwest Indiana, seasonal humidity, freeze-thaw cycles, and roof leaks make that pathway common.
The photo below shows the kind of damp interior that should trigger both a pest finding and a building repair.
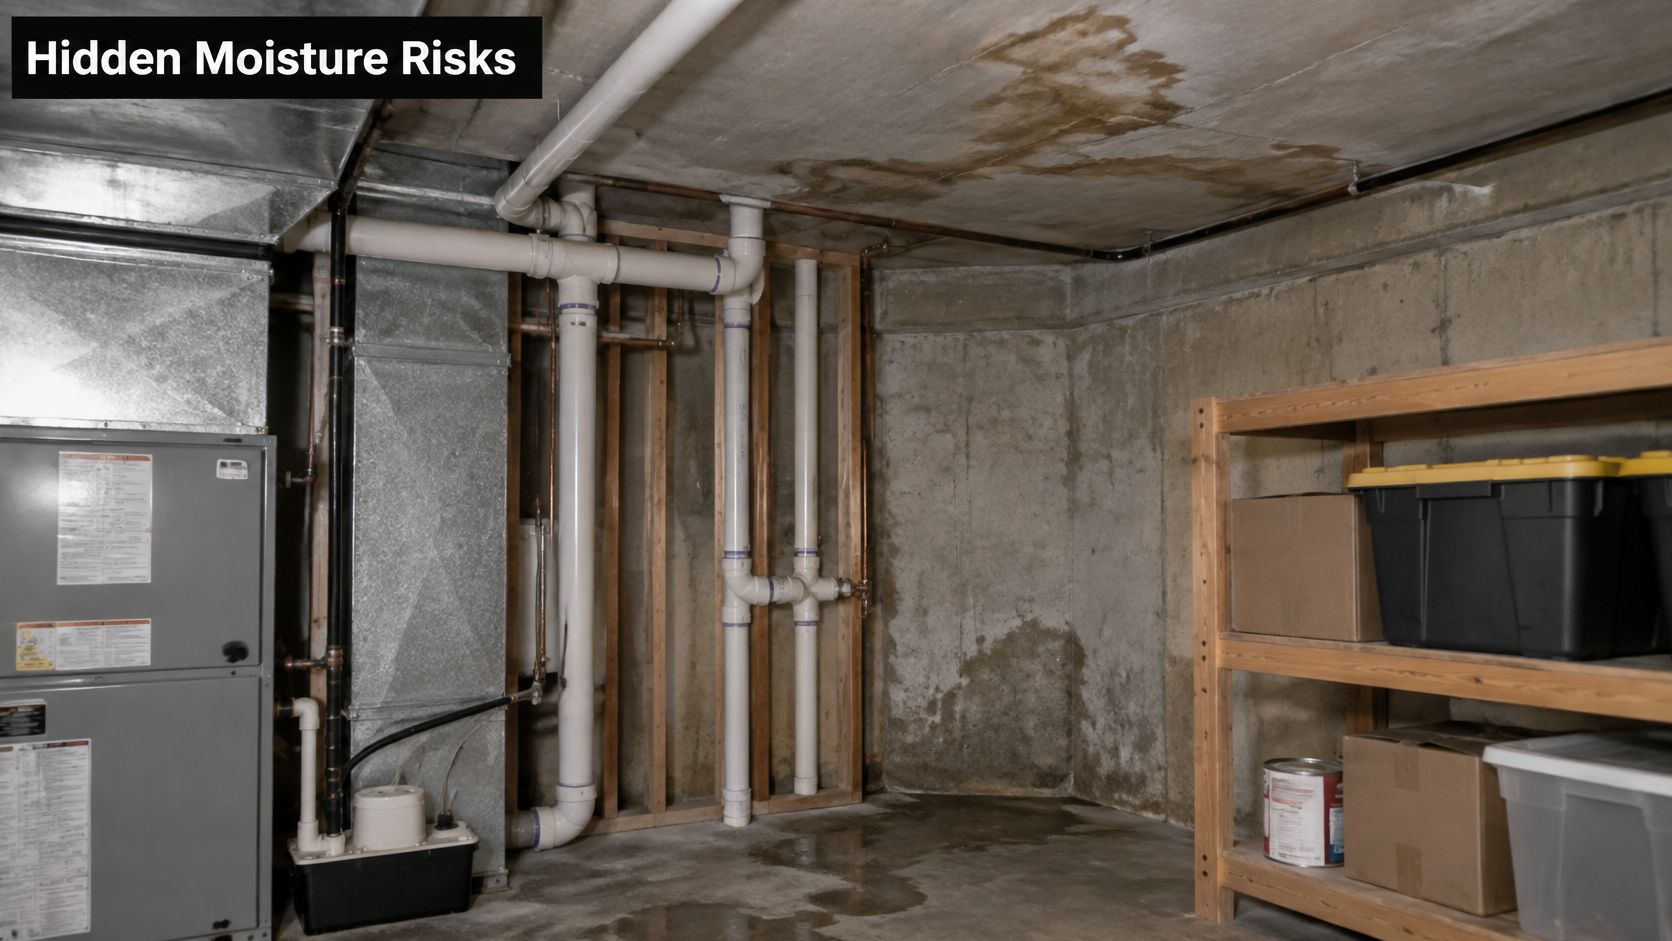
A visual commercial moisture survey should examine readily observable moisture-affected materials and physical deficiencies in the envelope, substructure, mechanical systems, and process areas, and ASTM E3026 identifies these conditions as relevant to commercial real-estate transactions and property management. Inspectors should correlate moisture indicators with pest evidence rather than treating either finding in isolation. Damp wall cavities, poorly drained condensate, and wet storage zones raise the likelihood of wood decay, moisture-associated insects, and recurring harborage.
A Measure, Trace, and Assign Sequence
- Measure conditions: Record temperature and relative humidity in representative zones, and keep indoor relative humidity below approximately 65% to reduce biological activity, as described in recent building-science research on damp buildings.
- Trace the source: Check roof penetrations, plumbing chases, loading docks, dumpster areas, kitchens, wall voids, and HVAC condensate locations.
- Separate patterns: Decide whether you're seeing an isolated sighting or a recurring building-system problem.
- Assign the repair: Name the owner, landlord, tenant, or facilities staff member responsible, with a completion date.
The video below helps facility managers see how moisture problems present inside a building.
Your report should name the apparent source, affected location, and visible severity, and it should distinguish visual observations from concealed-condition testing. Correcting the water source makes exclusion and sanitation last longer. Pesticide application may suppress symptoms while the water or ventilation pathway continues.
Preparing Your Building for a Commercial Inspection
Good preparation improves what the inspector can see. It doesn't mean staging the building to look cleaner than normal. Gather records first, clear access second, and leave everyday conditions visible.
Before the Inspector Arrives
- Gather records: Collect prior inspection reports, past treatment notes, pest complaints, and a floor plan or building layout.
- Open access: Keep walls, shelving, under-sink spaces, and equipment areas reachable. Move pallets and cardboard away from walls instead of stacking them against the building.
- Flag visible problems: Fix or report leaks, clear standing water, and store food in sealed containers.
- Trim and move exterior risks: Keep shrubs and vines off walls and exposed wood, and move firewood and wood debris away from the foundation.
- Handle mosquito sources: The CDC mosquito control at home guidance recommends emptying and scrubbing, turning over, covering, or discarding items that hold water once every week, including tires, buckets, planters, and trash containers.
- List locked areas: Name tenant spaces and rooms that can't be opened, so they're recorded as not inspected.
- Note recent changes: Tell the inspector about recent cleaning, repairs, or pesticide use, since each changes what evidence remains.
Don't rearrange storage just to look tidy. The inspector needs normal conditions, including the clutter, food storage, and waste patterns your staff creates on a regular day.
How a Commercial Inspection Unfolds Step by Step
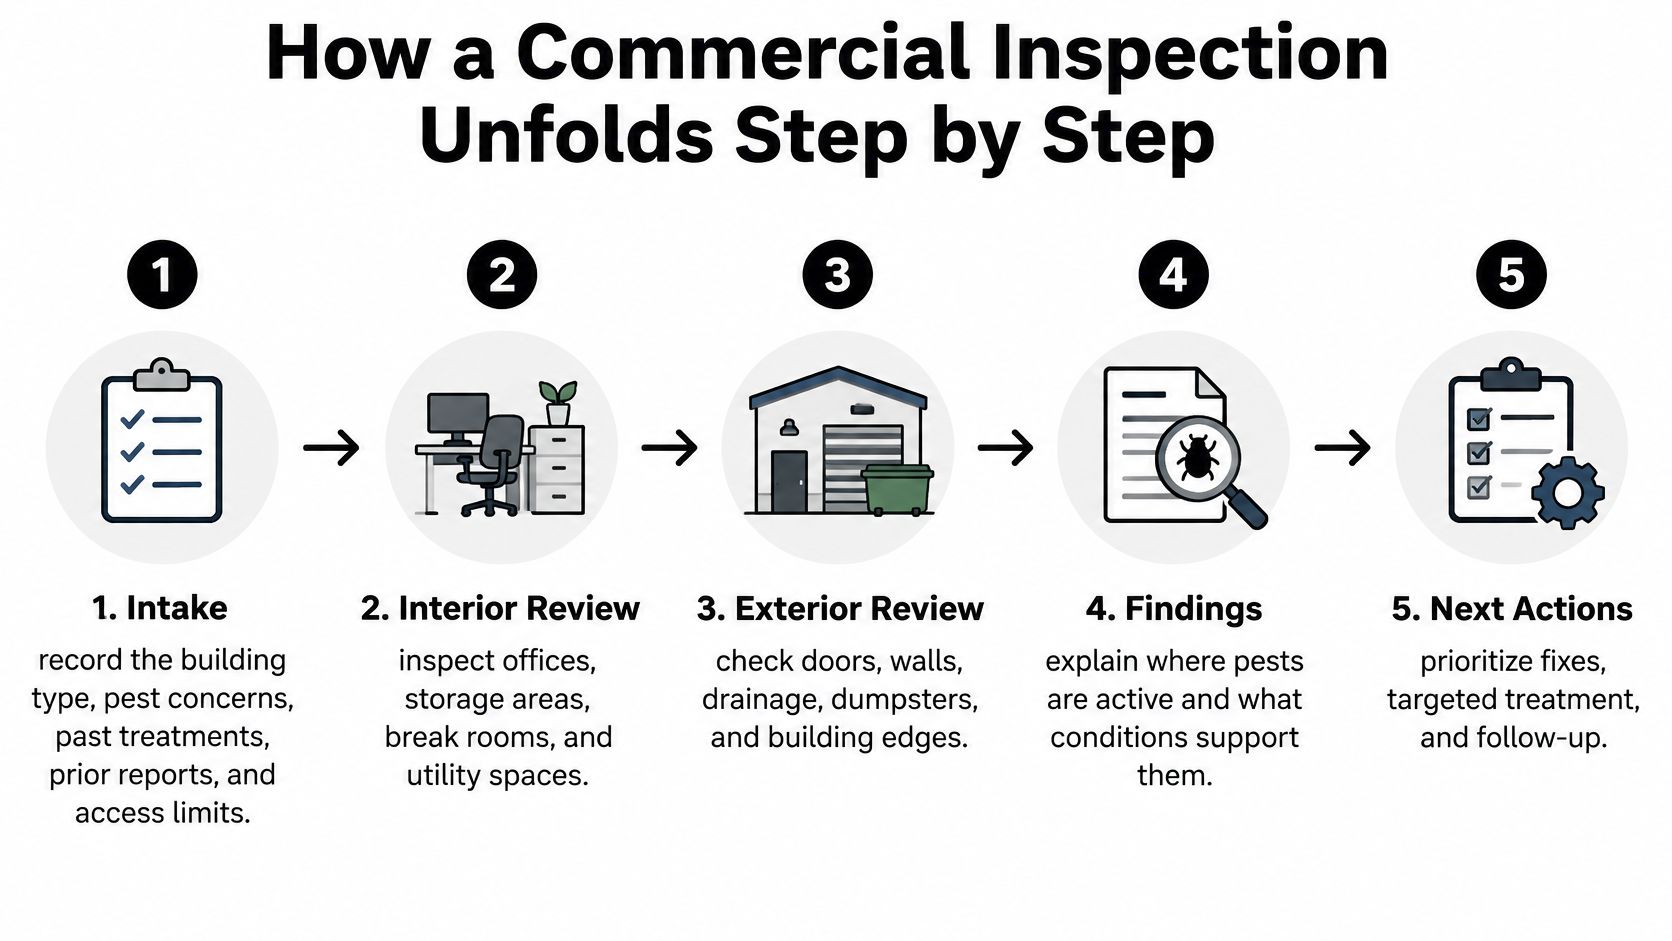
An inspection works best as the diagnostic first stage of Integrated Pest Management, not a hunt for visible bugs. The EPA IPM guidance document recommends recording inspection findings, monitoring results, recommendations, locations, techniques, and schedules, then updating the IPM plan as conditions change. That sequence gives you a baseline you can measure against later.
The process graphic below shows the flow from intake to next actions.
The Seven Steps on Inspection Day
- Intake: We record building type, pest concerns, past treatments, prior reports, and access limits. This prevents old evidence from being mistaken for a new problem.
- Interior walk-through: The inspector looks for live pests, droppings, trails, shed skins, damage, harborages, and entry points in kitchens, storage, offices, and utility spaces.
- Exterior and structural check: The perimeter, roof edges, dock and dumpster areas, and exposed wood are checked. Probing wood and checking foundation gaps can reveal activity you can't see from the floor.
- Moisture and sanitation review: Leaks, condensation, drains, food residue, grease, and clutter are logged by location, because these conditions explain recurrence.
- Species identification: The pest is confirmed before treatment is recommended. Misidentifying a stored-product pest can lead to ineffective treatment while the food source and access route stay unchanged.
- Monitoring setup: Traps, stations, or monitoring points are placed at logged locations with a check schedule, so later counts mean something.
- Risk-ranked report: Each observation links to a corrective action, such as sealing penetrations, repairing leaks, improving waste handling, or adjusting monitoring frequency.
A generic statement that pests were or weren't observed isn't enough for a facility. You need locations, conditions, and dated actions.
That first report becomes your baseline. At the next visit, monitor results show whether activity fell after repairs, whether a harborage was missed, or whether a new access point opened. For pest control in Crown Point, IN, that record is especially useful when tenants, landlords, and service staff each own part of the fix.
Reading the Report and Meeting Compliance Expectations
A clean report doesn't prove a building is pest-free. Concealed voids, locked rooms, nighttime activity, seasonal pests, and recent cleaning can all limit detection. Read the report as a decision record, with observed evidence, inferred risk, inaccessible areas, and recommended follow-up kept separate.
Report Fields and What to Do With Each
| Report field | What it tells you | What to do |
|---|---|---|
| Observed evidence | Pests or signs seen on the inspection date | Confirm species and location |
| Inferred risk | Conditions likely to support pests later | Plan the fix and its priority |
| Inaccessible areas | Spaces that could not be checked | Schedule access or a follow-up visit |
| Confidence level | How certain the finding is | Request reinspection when confidence is low |
| Conducive condition | Leak, gap, clutter or drainage problem | Assign the repair to a named party |
| Urgency | Whether action is needed now, soon or at the next cycle | Set the order of corrective work |
| Responsible party | Owner, landlord, tenant or provider | Confirm who pays and who acts |
| Verification date | When each repair was checked | Track closure in the building file |
Use confidence levels to trigger action. A low-confidence finding in a food area or tenant space should prompt reinspection, not reassurance. Facilities reviewing commercial kitchen pest control should confirm who owns drain cleaning, equipment gaps, and waste handling before the next cycle.
More technical detail doesn't automatically mean greater certainty, a point made in recent Springer research on moisture monitoring and building management, which also highlights monitoring, modeling, BIM, Internet-of-Things sensors, and artificial intelligence as emerging tools. Sensor data supports inspection, it doesn't replace opening access panels and checking harborages. Keep the finished report with building records for insurers, lenders, buyers, and tenants, and ask for a verification date on every corrective item.
How Often Commercial Buildings Need Inspection
Frequency follows risk, not a fixed calendar. Food handling, stored goods, heavy occupant traffic, building age, moisture history, and past findings all push the interval shorter. A quiet office and a busy grocery shouldn't share the same schedule just because they're similar in size.
Typical Starting Intervals by Property Type
| Property type | Typical interval | Extra visit trigger |
|---|---|---|
| Restaurant or food service | Monthly | Pest sightings or food-area findings |
| Warehouse or distribution | Monthly to quarterly | Stored-product findings or dock damage |
| Office building | Quarterly | Tenant complaints or moisture events |
| Retail or grocery | Monthly to quarterly | Sightings in food or stock areas |
| Healthcare or school facility | Quarterly | Infection-control concerns or complaints |
| Multifamily or rental property | Twice yearly plus each turnover | Unit turnover or tenant reports |
| Property sale or lease | One-time before closing | Lender, buyer or tenant requirement |
Treat those intervals as starting points that we adjust after the first inspection. If monitors stay clear and repairs hold, visits can focus on verification. If activity persists, the interval should shorten until the source is controlled.
Extra visits are justified outside the schedule after a new sighting, tenant complaint, flood, roof leak, unit turnover, or change in building use. Season matters in Northwest Indiana too. Termite swarms are most often noticed in spring, rodents move indoors as weather cools in autumn, and mosquitoes follow warm, wet periods. Between professional visits, routine source checks help, such as emptying outdoor containers, clearing gutters, checking dumpster lids, and reporting leaks promptly.
Scheduling test: Review the interval after every report, and use the next visit to verify completed repairs, not just look for new pests.
Acting on Findings and Booking Your Inspection
An inspection report earns its keep only when each line becomes a task. Take every finding, whether it is a gap under a dock door, a slow floor drain in a mop closet, or droppings along a wall void, and give it an owner and a completion date. That habit converts a one-time walkthrough into a building-condition record you can verify at the next visit.
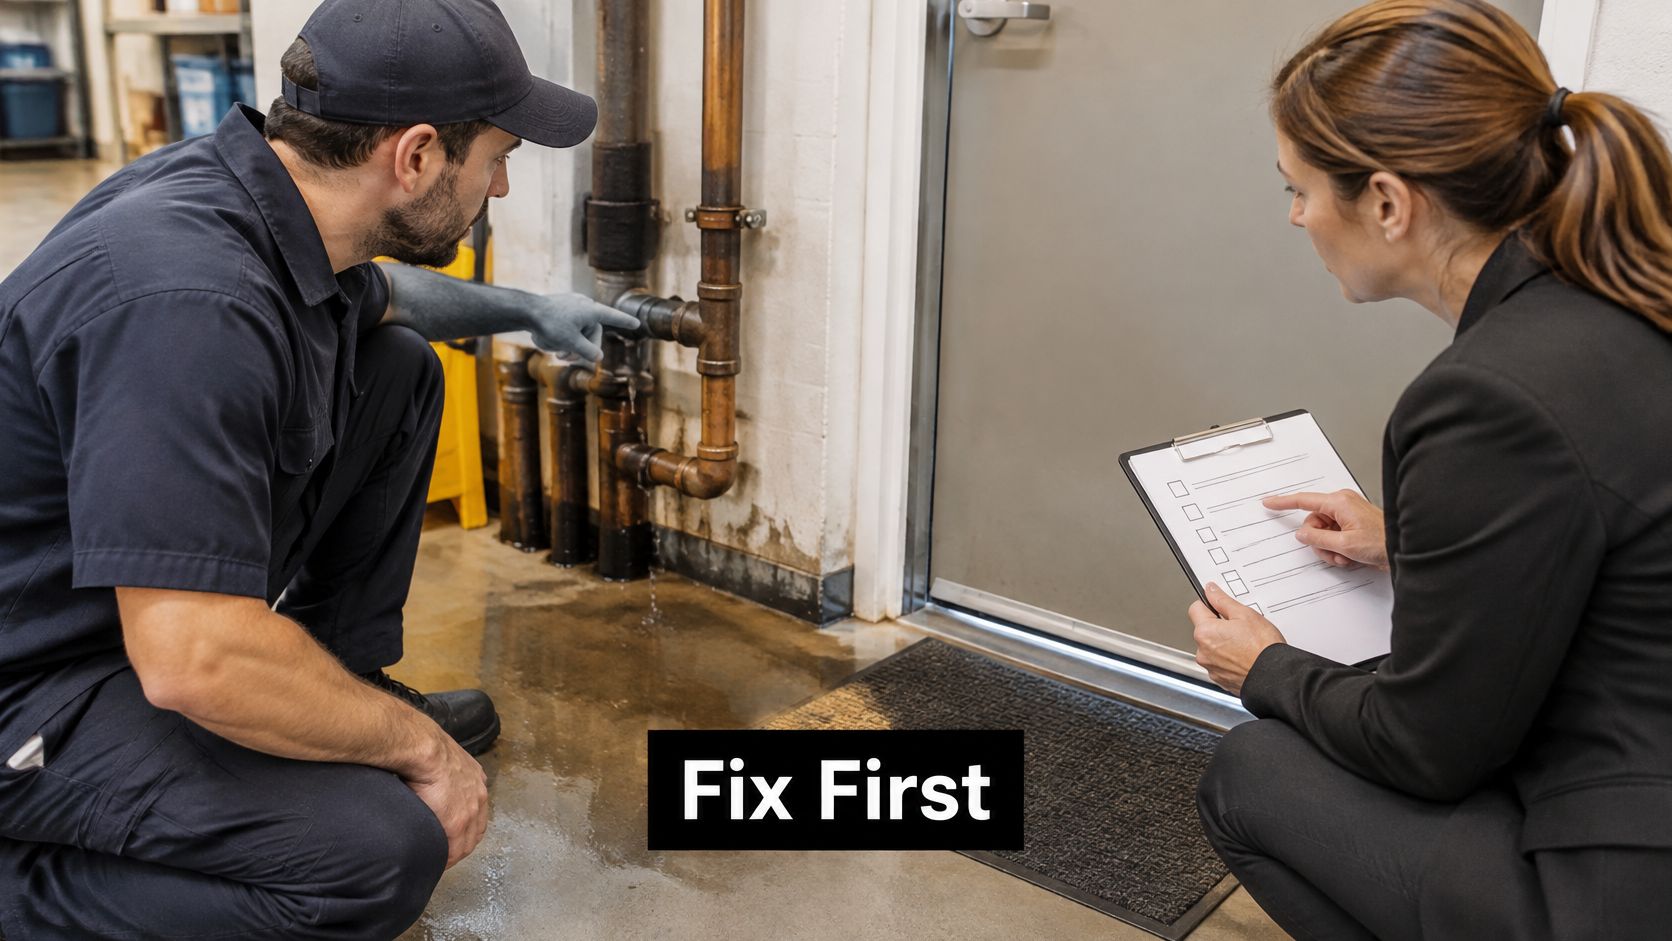
Repair the conditions that feed pests before you lean on treatment. Fix leaks, seal gaps around walls, doors, and utility lines, correct poor drainage, and address sanitation problems first. Then apply targeted, eco-friendly pest control only where pests are present and the labeled product fits the site, whether the need is spider control, wasp removal, rodent exclusion, or preventative pest treatments.
The image below shows why a plumbing finding belongs on the same action list as a pest finding.
Credentialing matters when you choose a provider. The EPA tips for selecting a pest control service state that each pest-control company should have at least one certified, licensed commercial pesticide applicator in the appropriate service category, and other applicators must be certified or work as licensed technicians under direct supervision. EPA also advises requesting credentials and pesticide labels showing the authorized application rate and required precautions, and says pesticides shouldn't be applied unless pests are present and cannot be controlled by other means. Our technicians are licensed for structural pest control by the Department of Public Health, and each holds licenses in certain sub-categories, with specialization in areas such as rodent control, food service, or termite control.
Commercial customers can request a free quote for pest control. Call Monday through Friday, 8:00 AM to 4:00 PM, at (219) 779-9815, describe the building and the concern, and our team will identify the pest problem and design a customized commercial pest elimination program aimed at problem areas, so you aren't charged for unnecessary treatments. Some accounts need an on-site visit before an accurate proposal, and a licensed technician may provide a verbal or written proposal. Larger operations coordinating several vendors may also find quotes and scheduling for pest control teams useful context for handling inquiries promptly.
Before you call, gather the details that shape pricing and scope: building size, pest history, access limits, prior reports, and the areas you want covered. Pricing varies with the size of the business, the type of pest, the service required, and the materials used, so the more you can share up front, the sharper the proposal.
If you're looking for pest control near me or a commercial pest inspection in Crown Point, IN, The Green Advantage can assess your facility, explain the findings in plain language, and build a targeted program for the problem areas instead of charging for unnecessary treatments. Request a free commercial quote, schedule an on-site assessment with a licensed technician, and receive a written or verbal proposal that explains each finding and the recommended next steps for the problem areas by visiting The Green Advantage.